
Automatically Generate Documentation for GitHub Pages
This guide walks through how to set up a workflow to automatically generate documentation for a project and upload it to the project’s associated GitHub Pages. The critical part of this tutorial, the GitHub Action, comes from this blog.
Prerequisites
There are only two simple requirements for this.
- Have Doxygen installed. For one way to install it, see my other tutorial.
- Have the code set up as a GitHub project.
Step One - Document
Obviously, the first step is to document the code (if you haven’t been doing that as you go). Make sure to follow Doxygen’s format. Their instructions are located here, however the key instructions on formatting the documentation is located at https://www.doxygen.nl/manual/docblocks.html. If you have time, I recommend looking through more of it, as it is a pretty powerful tool. I still don’t know all the features it can perform.
I won’t go into all the details of documentation formatting. However, when you are done, each function, class, namespace, etc. should have documentation that looks vaguely like this.
/**
 * @brief Performs some AI task.
 *
 * A detailed description of why this algorithm works and what behavior to expect.
 * @param arg1 What the first argument to the function should be.
 * @return What you can expect to get back from the function.
 */
float doAI(int arg1){
Additionally, this is a good time to put together your README.md with any usage instructions. You can configure Doxygen to use it as a main page, which is a great way to present key information to visitors. I believe there is also a way to set up additional markdown pages, I just haven’t had the chance to explore that feature yet.
Step Two - Configure Doxygen
Doxygen uses a configuration file called Doxyfile to specify how the documentation should be processed. I prefer to place the file at the root of the project. You can add settings to the file by hand, but there is also a GUI that walks you through everything, as shown below. When you save, it will generate the Doxyfile automatically. It can also run Doxygen to generate documentation. I like the GUI, as it organizes the settings by topic, such as HTML output settings. It also provides descriptions for what each setting does. This makes it a bit easier to work with.
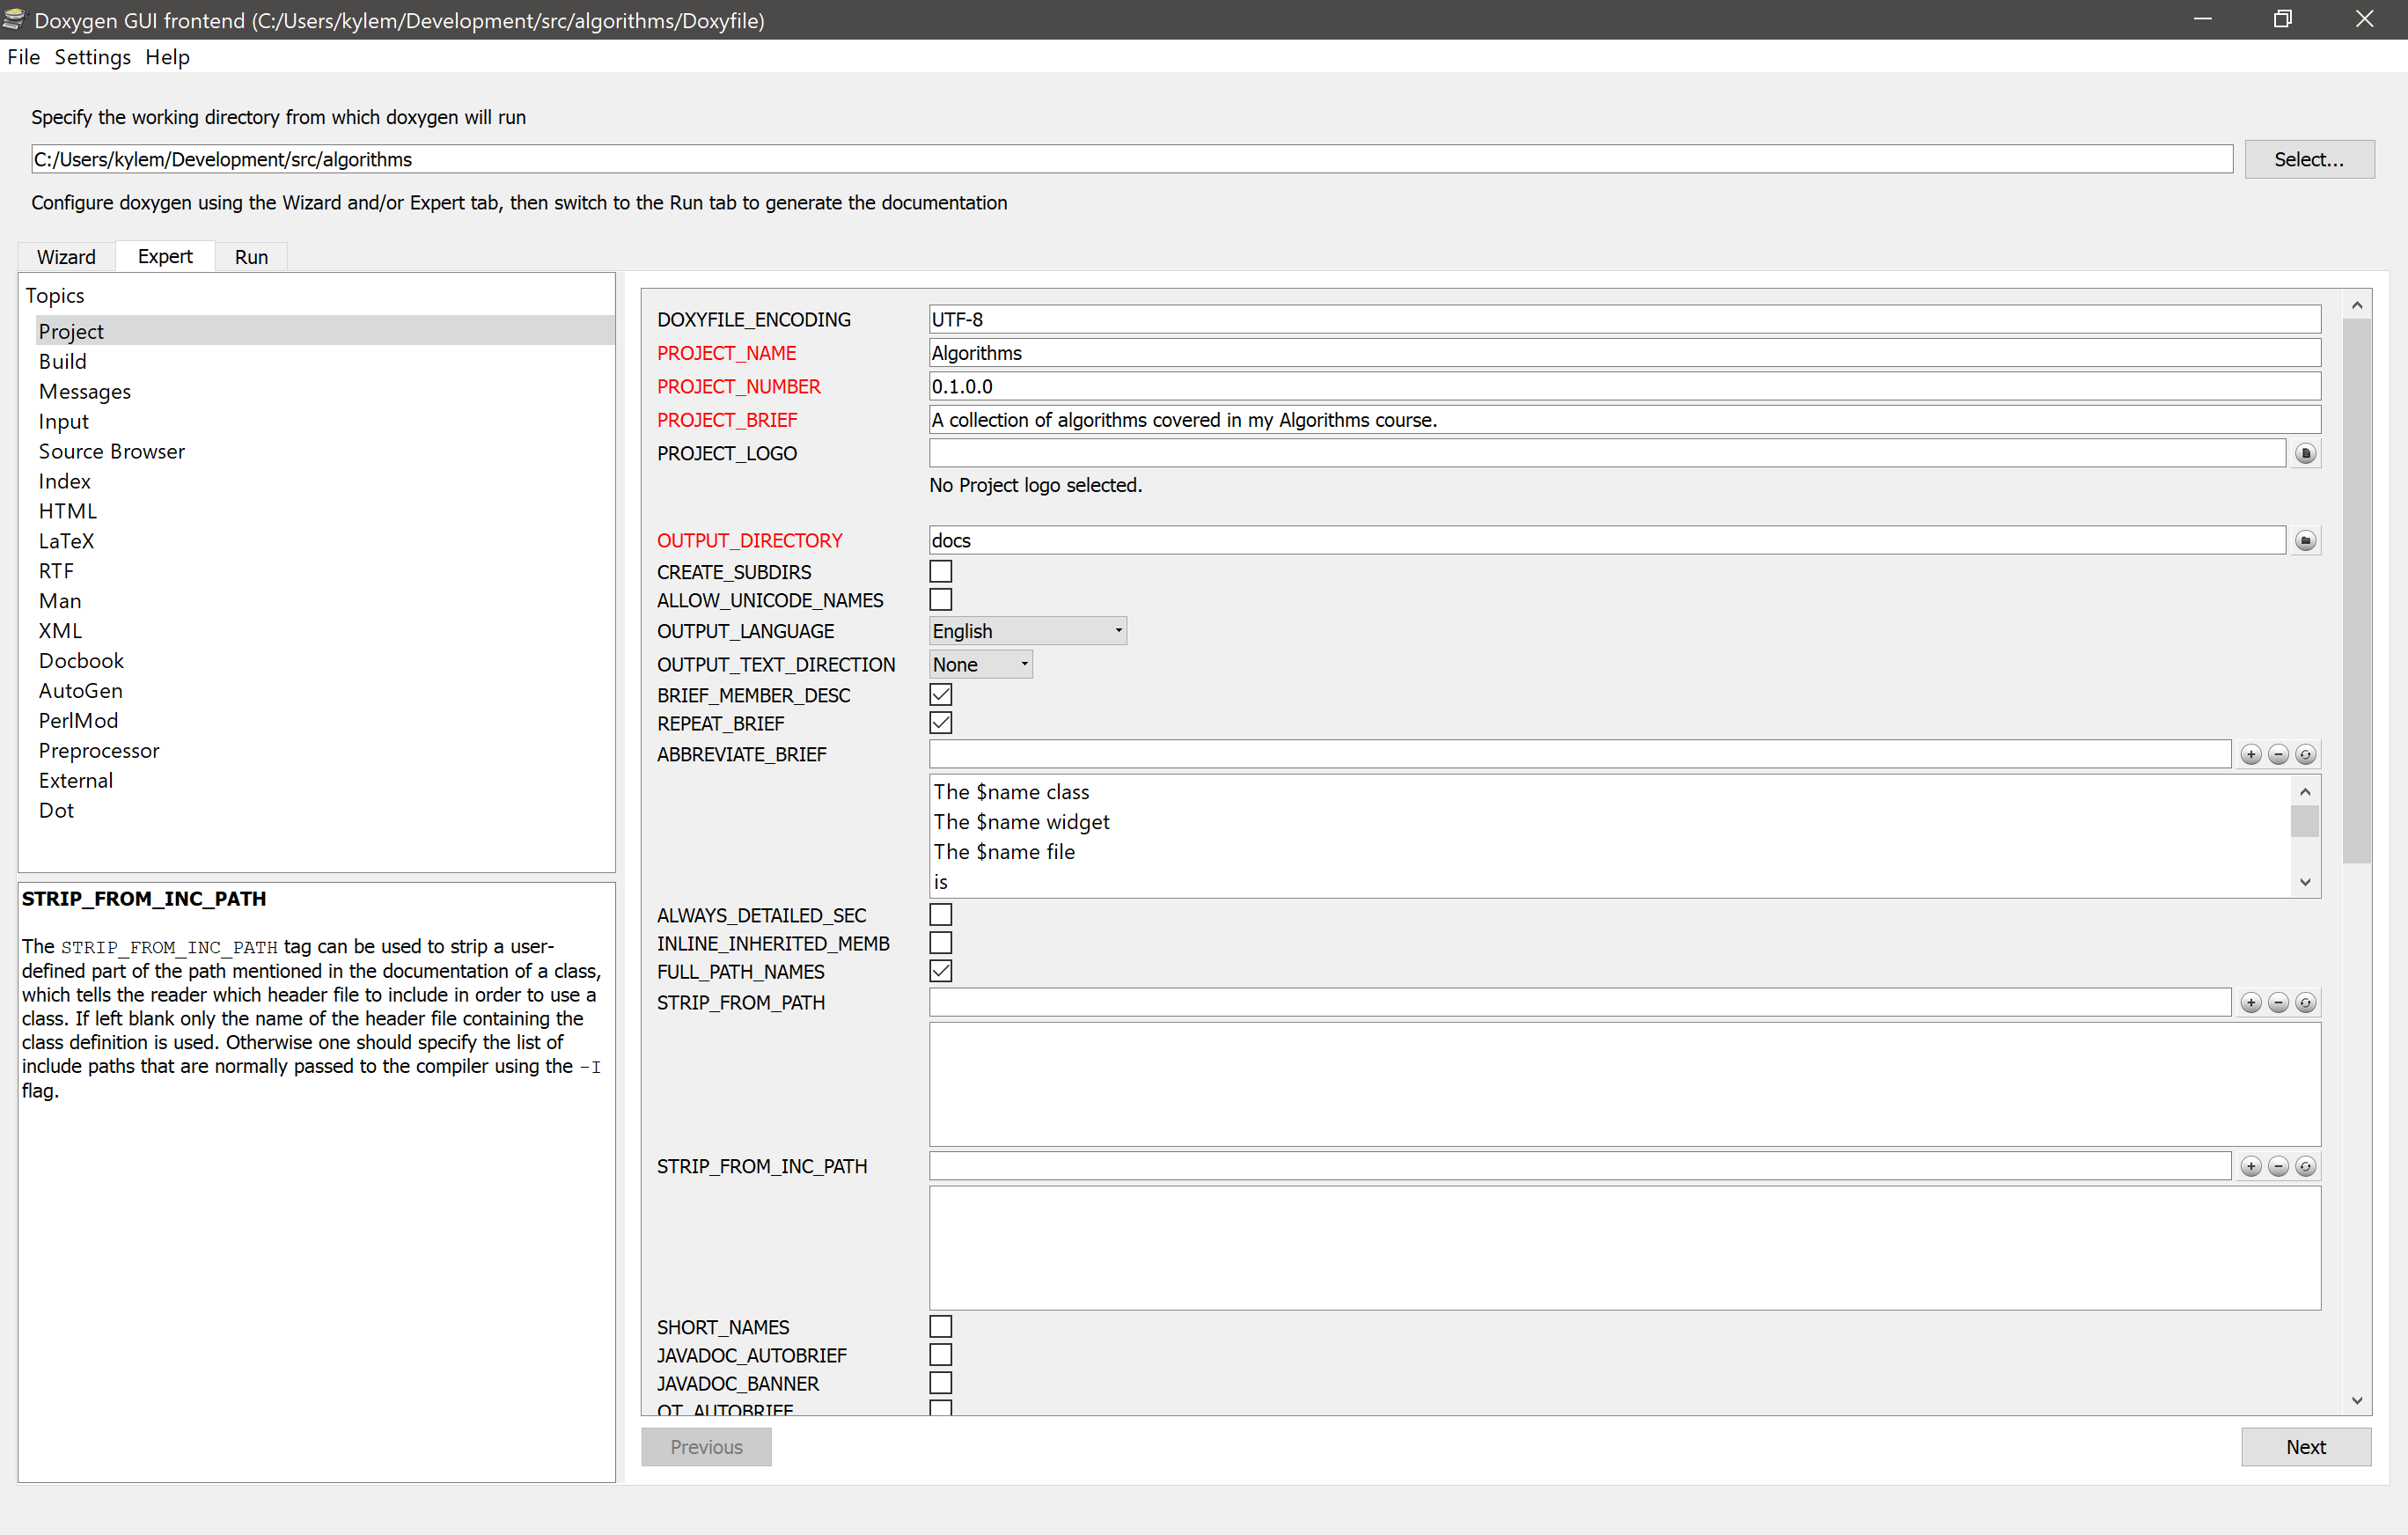
I have found that I typically use very similar settings across projects. Most are left at the default values, but I do modify some. Here are some of the settings I always set and why.
| Setting | Value | Description |
|---|---|---|
| OUTPUT_DIRECTORY | docs | Tells Doxygen where to place html files. I always use a subdirectory called docs. Make sure this is a relative path, otherwise errors will occur later. |
| EXTRACT_ALL | False | If this were set to true, it would assume the documentation is complete and skip functions not documented, which I don’t want. |
| EXTRACT_* | True | For almost every other setting starting with EXTRACT, making the value True will add additional documentation, such as private members. |
| WARN_NO_PARAMDOC | True | This tells Doxygen to warn me if it finds an undocumented function. Setting EXTRACT_ALL to true disables this. |
| RECURSIVE | True | Searches subfolders for documentation as well. |
| USE_MDFILE_AS_MAINPAGE | README.md | Tells Doxygen to use a provided Markdown file as the main page. I always like to display the README. |
As I configure the settings, I like to run Doxygen locally. It isn’t strictly necessary, but it helps identify any errors or warnings early on. It also gives you a preview of what the documentation will look like.
Step Three - Setup Action
Once you are happy with the Doxyfile, the next step is to add an Action file. This will tell GitHub what to do in order to process the documentation and make it available for Pages. I use the exact same setup for every project, so just copy and past the below code into .github/workflows/deploy_pages.yml. This file is also available here.
# This workflow generates documentation for a project using Doxygen and sets it up for GitHub pages. It will push the
# documentation onto a special orphan branch to avoid cluttering the source code. This implementation comes from
# https://ntamonsec.blogspot.com/2020/06/github-actions-doxygen-documentation.html
name: Deploy Documentation

# Controls when the action will run.
on:
  push:
    branches: [ main ]

jobs:
  build-documentation:
    runs-on: ubuntu-latest
    steps:
      - name: Checkout
        uses: actions/checkout@v2
      - name: Run Doxygen
        uses: mattnotmitt/doxygen-action@v1.2.1
        with:
          # These are default values, but included for clarity
          doxyfile-path: ./Doxyfile
          working-directory: .
      - name: Pages Deployment
        uses: peaceiris/actions-gh-pages@v3
        with:
          github_token: ${{ secrets.GITHUB_TOKEN }}
          publish_dir: ./docs/html/
          enable_jekyll: false
          allow_empty_commit: false
          force_orphan: true
          publish_branch: github-pages
There are three steps, plus the trigger for the action.
on:
  push:
    branches: [ main ]
This part tells the Action to only trigger when code is pushed/merged into the main branch. You can add additional triggers, which can be useful for debugging this action, but I generally only want to generate documentation for code that has passed code review and made it into the main codebase.
- name: Checkout
  uses: actions/checkout@v2
This just checks out the code within the Actions workspace. This is pretty standard to most Actions.
- name: Run Doxygen
  uses: mattnotmitt/doxygen-action@v1.2.1
  with:
    # These are default values, but included for clarity
    doxyfile-path: ./Doxyfile
    working-directory: .
This runs the Doxygen processing. More information can be found here. I use the default settings, but you can customize. There is a third setting for LaTeX processing that I don’t use. Additionally, this part is why relative path names are important in your Doxyfile. It will fail if you use absolute, unless your computer happens to have the exact same folder structure as the one running the Action.
- name: Pages Deployment
  uses: peaceiris/actions-gh-pages@v3
  with:
    github_token: ${{ secrets.GITHUB_TOKEN }}
    publish_dir: ./docs/html/
    enable_jekyll: false
    allow_empty_commit: false
    force_orphan: true
    publish_branch: github-pages
After documentation is generated, this action commits the documentation to a separate branch. The site has very extensive information on all the settings. Basically, I have it set up to tell the action to look for my documentation in ./docs/html/, which should match the location you set in OUTPUT_DIRECTORY in your Doxyfile. (Note: Whatever folder you set, Doxygen will make a subfolder under it called html, hence the additional subfolder specified here.) It then commits it to an orphan branch separate from the rest of my code, called github-pages. This keeps the documentation available for Pages, but out of my primary Git history to avoid clutter.
Step Four - Merge
When those files are configured, plus all the documentation is written, everything can be merged into main. If you go to the action pages after merging, you should see the job running and hopefully completing successfully, like so.
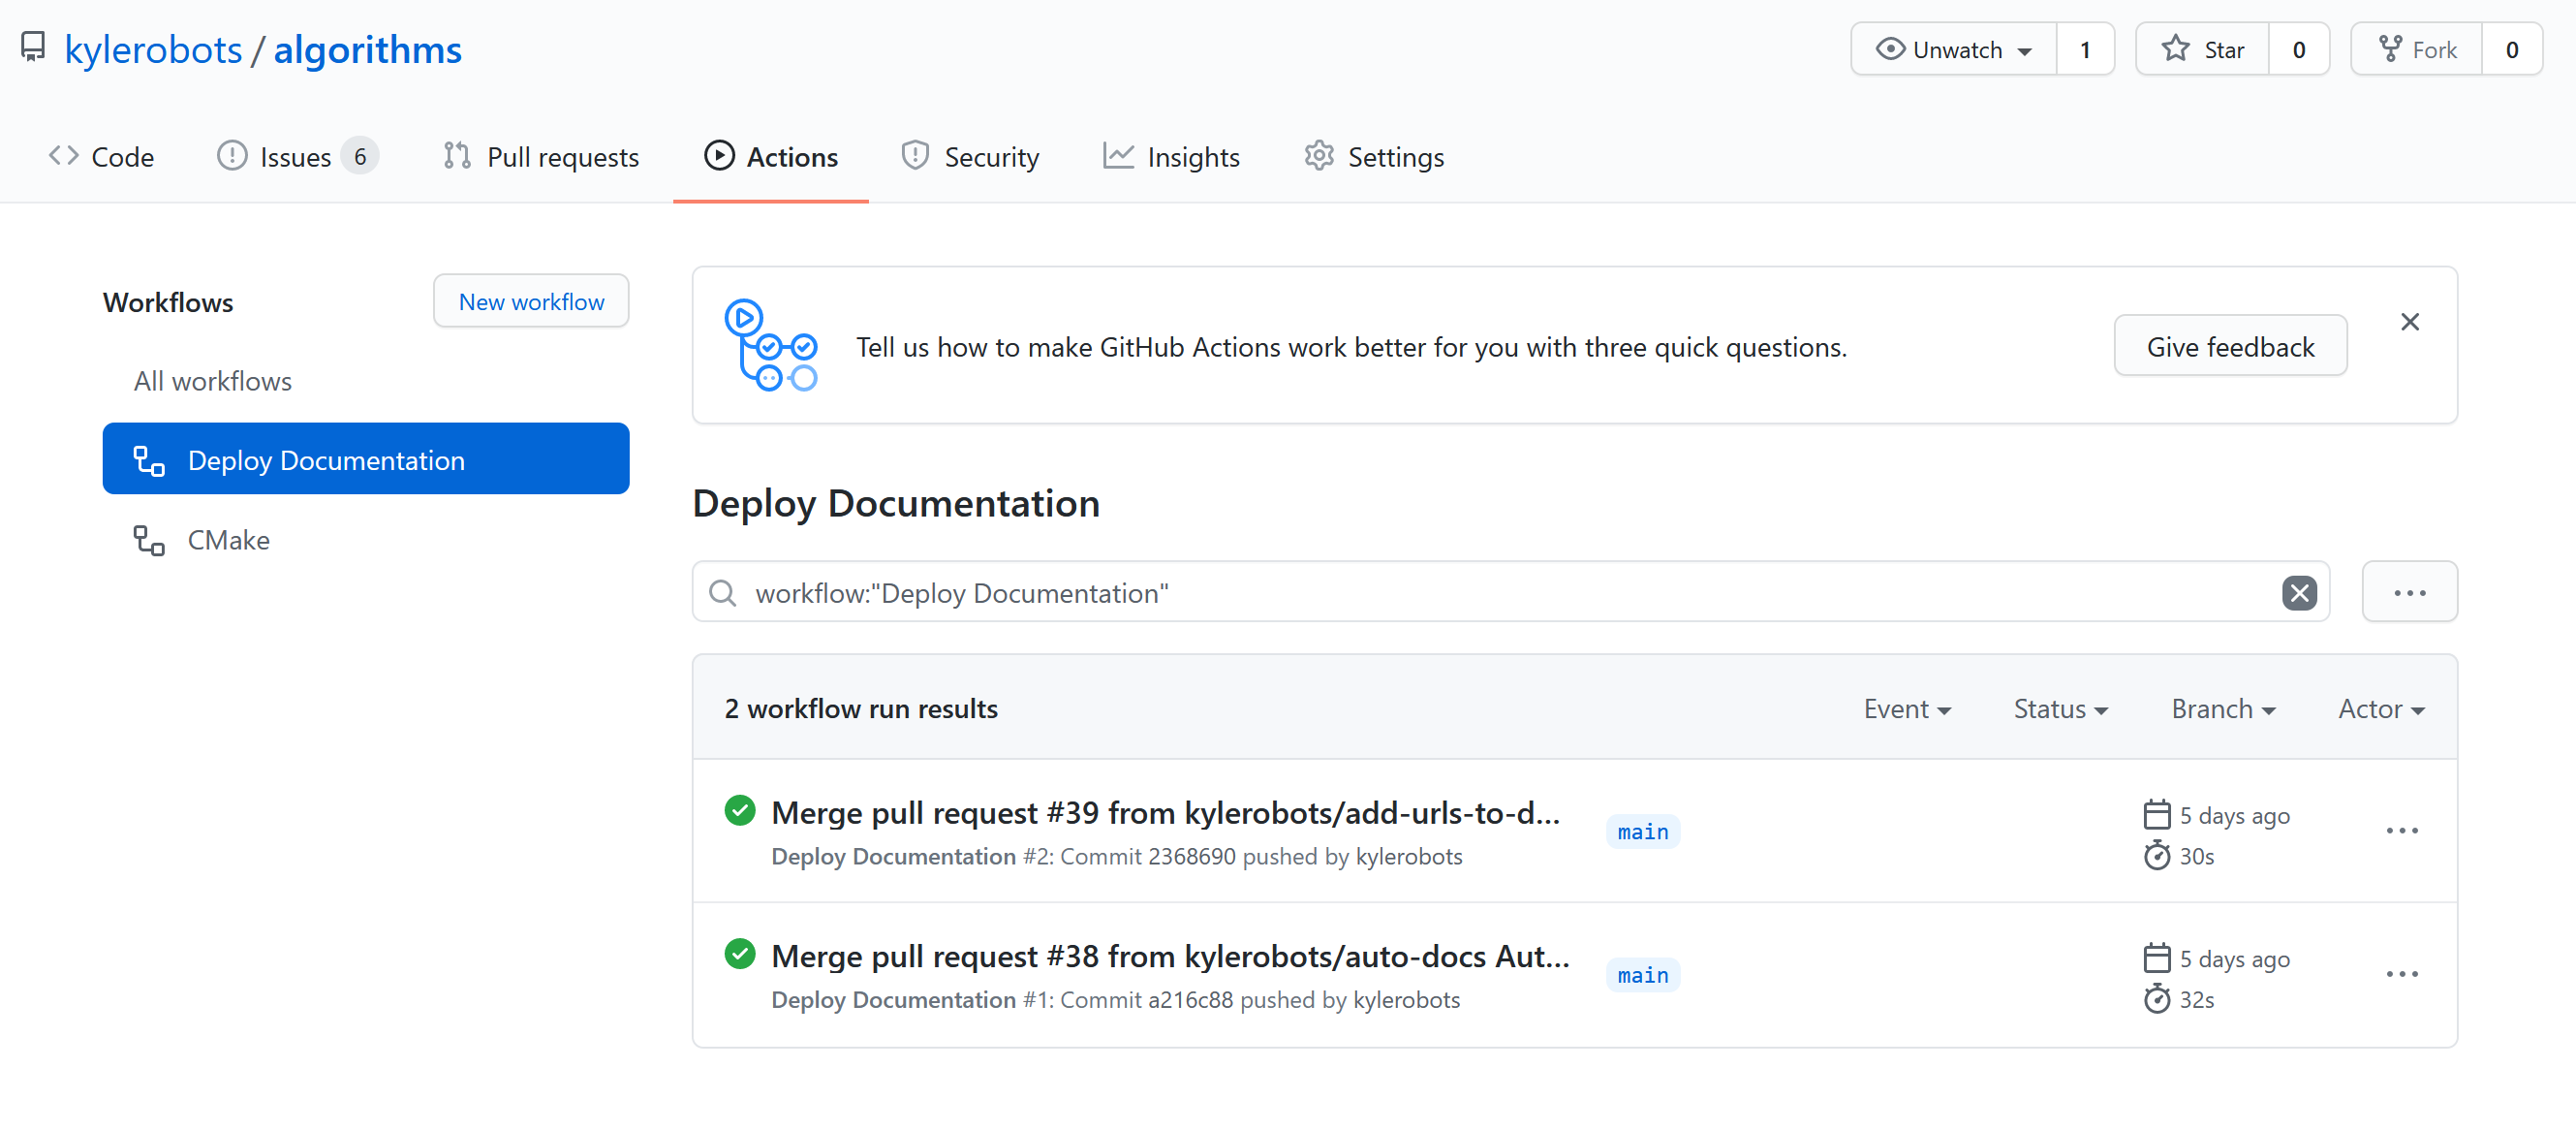
If something failed, clicking on the job will bring up the output from each step of the Action. This should help with debugging.
If the action was successful, you should now see a new branch “github-pages.” If you go to it in GitHub, you will see the documentation at the root directly without any code. This is expected behavior.
Step Five - Setup Pages
The last step is to enable the Pages. Within your project on GitHub, go to Settings. Under Options scroll down until you see a section called GitHub Pages.
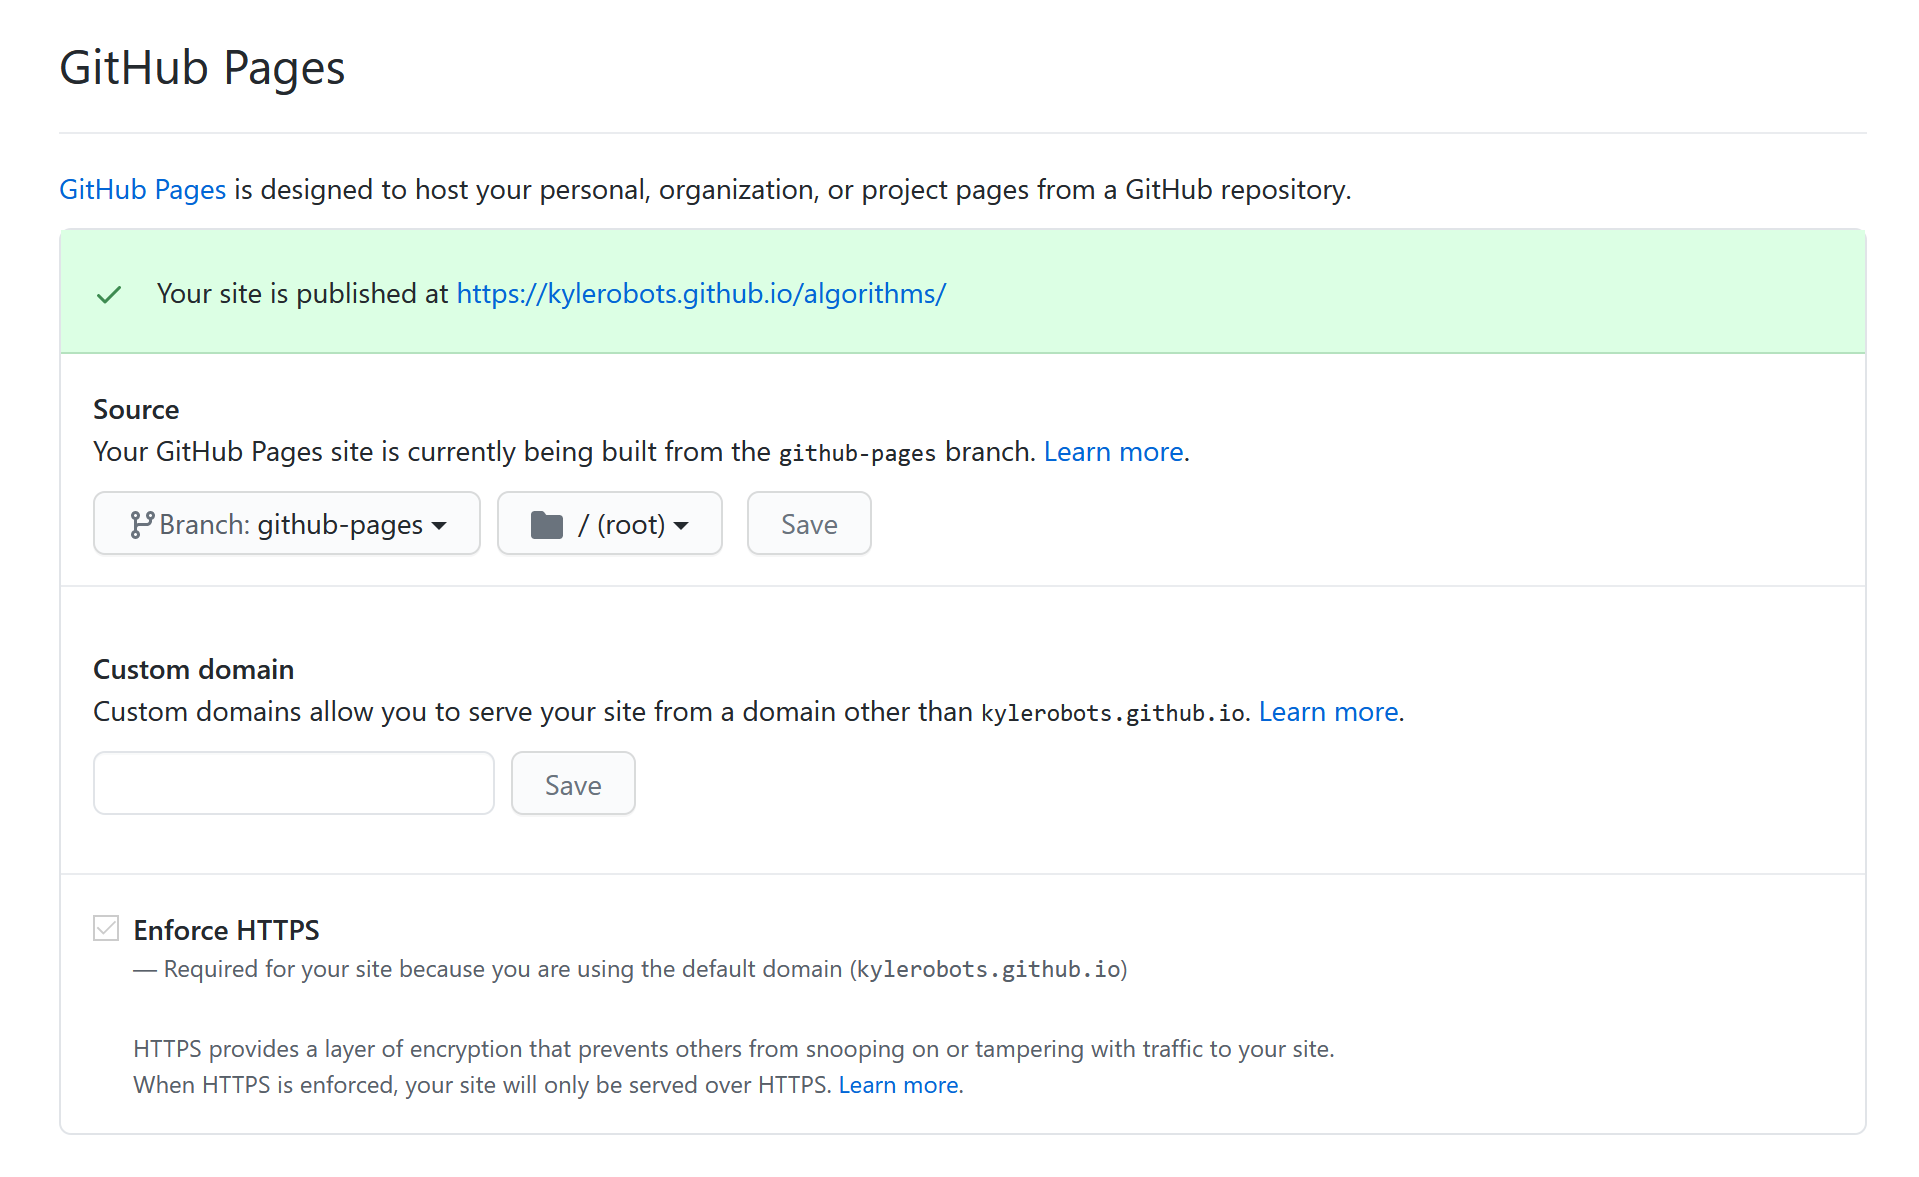
Pick the branch that you set in the Action. Additionally, select Root for the file location, as that is where the Action places all the generated html code.
After enabling, wait a little bit for the pages to generate. You can then navigate to the URL provided and should see your documentation. It will look exactly like the test you ran locally. If everything works, the Actions will now handle all the documentation updates and generation any time new code is pushed. All you have to do is make sure to add documentation as you develop.
Additionally, you can link to this documentation via the provided URL. I always put a link in my README so anyone on viewing my code repository on GitHub knows to go to the pages. I also put all my projects on this site to showcase my work.
Overall, it is a little bit of extra setup that drastically reduces the amount of work required later on and increases the usability of any of your projects.