C++ Testing Part 3: Static Analysis
This is part of a series covering basic usage of several testing tools for C++ code. This includes Google Test for unit testing, gcovr for test coverage metrics, and Clang-Tidy for static analysis. This series will show you how to incorporate each tool into a project.
This is Part 3 of the series and adds static analysis using Clang-Tidy. Static analysis can help catch errors in the code that aren’t necessarily compile errors, but still issues. For example, it can check for out-of-bounds indexing on array. In addition, it can also assist in some style suggestions. This tutorial will cover running it from the command line and from within VS Code.
Installation
To run Clang-Tidy from the command line, you will need to install it on your system with apt-get install clang-tidy.
If you are running in VS Code, you will need the
C/C++ Extension. This extension comes with its
own version of clang-tidy, so you don’t need to install it separately. (Although you can tell it to use a separately
installed version.)
Command Line Use
There are a bunch of different options that you can specify on the command line. The full list is found with --help.
Briefly, you will need to specify what checks you want to run, which files to check, and some other configurations. You
can also set many of these options in a configuration file and use that instead.
Selecting Checks
The full list of checks is available
on the documentation site. There are a lot of different
options, many of which are for specific projects. For example, there are a number of checks for LLVM and Android. They
can be selectively disabled or enabled with a comma separated list. This list can use * as wildcards and - to disable
checks. As an example, let’s say you want every check except for the ones that are part of LLVM. Then the flag would be
--checks=*,-llvm*. Note that some check have additional options you can customize. The online documentation summarizes
each.
Selecting the Files
There are a few parts to specify where to scan. You need to tell it where your compile instructions are located, which
header files to include, and the location of the source files. If you are using CMake, your compile instructions are in
your build folder, so use the flag -p <path_to_build>. The header files are specified as a RegEx. To include any in
your code repository, use --header-filter=.* assuming you are running this command from your repository’s root
directory. The source files are specified as a list of arguments at the end of the command. So to scan every file in
your source and test directories, it would look like src/* test/*. Note that each input is a separate argument, not
a comma separated list as with the checks.
Customization
While there are a whole bunch of options available, there are two that I am going to highlight. The first is to treat
all warnings as errors. Some checks are just considered warnings if they are found, but you may want to treat them as
errors for CI or quality reasons. You can treat every check as an error with --warnings-as-errors=*. Alternatively,
you can provide a comma separated list for this flag, similar to what you did for enabling checks.
Additionally, some checks can be automatically fixed. To do so, use the --fix flag or the --fix-error flag. The
first stops on compiler errors, the second does not. You can also specify the formatting style to use when applying the
fixes with --format-style. There are several ways to specify this, depending on how you set your style.
Running
So putting all of the above together, an example command would look like the following.
clang-tidy --checks=*,-llvm* --warnings-as-errors=* -p build/ --header-filter=.* src/*
In this command, I am running every check except for LLVM ones, treating all warnings as errors. I also am only checking the files in my source directory and not fixing any issues. This produces the following output, which may or may not be in color.
28652 warnings generated.
67893 warnings generated.
/workspaces/cpp-unit-test-example/build/../include/classify_triangle.h:22:14: error: use a trailing return type for this function [modernize-use-trailing-return-type,-warnings-as-errors]
TriangleType classifyTriangle(double side1, double side2, double side3);
~~~~~~~~~~~~ ^
auto                                                                    -> TriangleType
/workspaces/cpp-unit-test-example/src/classify_triangle.cpp:4:14: error: use a trailing return type for this function [modernize-use-trailing-return-type,-warnings-as-errors]
TriangleType classifyTriangle(double side1, double side2, double side3) {
~~~~~~~~~~~~ ^
auto                                                                    -> TriangleType
/workspaces/cpp-unit-test-example/src/classify_triangle.cpp:17:5: error: do not use 'else' after 'return' [readability-else-after-return,-warnings-as-errors]
  } else if (side1 == side2 || side2 == side3 || side1 == side3) {
    ^~~~~~~~~~~~~~~~~~~~~~~~~~~~~~~~~~~~~~~~~~~~~~~~~~~~~~~~~~~~~~
/workspaces/cpp-unit-test-example/src/example.cpp:5:5: error: use a trailing return type for this function [modernize-use-trailing-return-type,-warnings-as-errors]
int main(int, char**) {
~~~ ^
auto                  -> int
/workspaces/cpp-unit-test-example/src/example.cpp:5:13: error: all parameters should be named in a function [hicpp-named-parameter,readability-named-parameter,-warnings-as-errors]
int main(int, char**) {
            ^
             /*unused*/  /*unused*/
Suppressed 67886 warnings (67886 in non-user code).
Use -header-filter=.* to display errors from all non-system headers. Use -system-headers to display errors from system headers as well.
5 warnings treated as errors
From this list, we can see a number of issues with some suggested changes. Later on, we’ll fix some of them. There are also a number of issues identified in system code outside the scope of this project. These suppressed warnings can be safely ignored.
Configuration File
This command can start to get very unwieldy if you are using a bunch of different checks. To help simplify this, clang-tidy also supports reading from a configuration file. The easiest way to generate this file is to have clang-tidy do it.
clang-tidy <your_config_options_here> --dump-config > .clang-tidy
This will automatically generate the right setup and put it in a file called .clang-tidy. Note that this also includes
any options available for your checks, so this file can get kind of long. After dumping the values, you can modify the
configuration if you want. As an example, the file looks similar to this.
---
Checks:          'clang-diagnostic-*,clang-analyzer-*,*,-llvm*'
WarningsAsErrors: '*'
HeaderFilterRegex: '.*'
AnalyzeTemporaryDtors: false
FormatStyle:     none
CheckOptions:
  - key:             abseil-string-find-startswith.AbseilStringsMatchHeader
    value:           'absl/strings/match.h'
To run the tool using this file, use this command.
clang-tidy --config='' -p build/ src/*
While you still need to specify the build and source directories, this is a much shorter command. If your configuration
file is not called .clang-tidy, then the path to the file should go in the quotes after --config. Running this
command should produce identical output to what was above.
VS Code
If you are using VS Code for development, you can also have the editor run these checks on its own. This has the added benefit of providing analysis right in the window as you work.
To set this up, open the user settings and search for “Code Analysis”. There are a bunch of settings available, with
descriptions of each. Make sure that C_Cpp.codeAnalysis.clangTidy.enabled is true. If you made a configuration file
as shown above and called it the default name, the extension will use it automatically. Otherwise, you can selectively
disable and enable checks with C_Cpp.codeAnalysis.clangTidy.checks.disabled and
C_Cpp.codeAnalysis.clangTidy.checks.enabled respectively. There is also a way to pass in arguments as you would on the
command line.
Once this is set up, you can tell VS Code to either scan active files or all files in your repository. Be careful when selecting all files, as it will scan the Google Test code that was downloaded into the build folder. I have partially avoided this by just running before the build folder is created or by only running on open files.
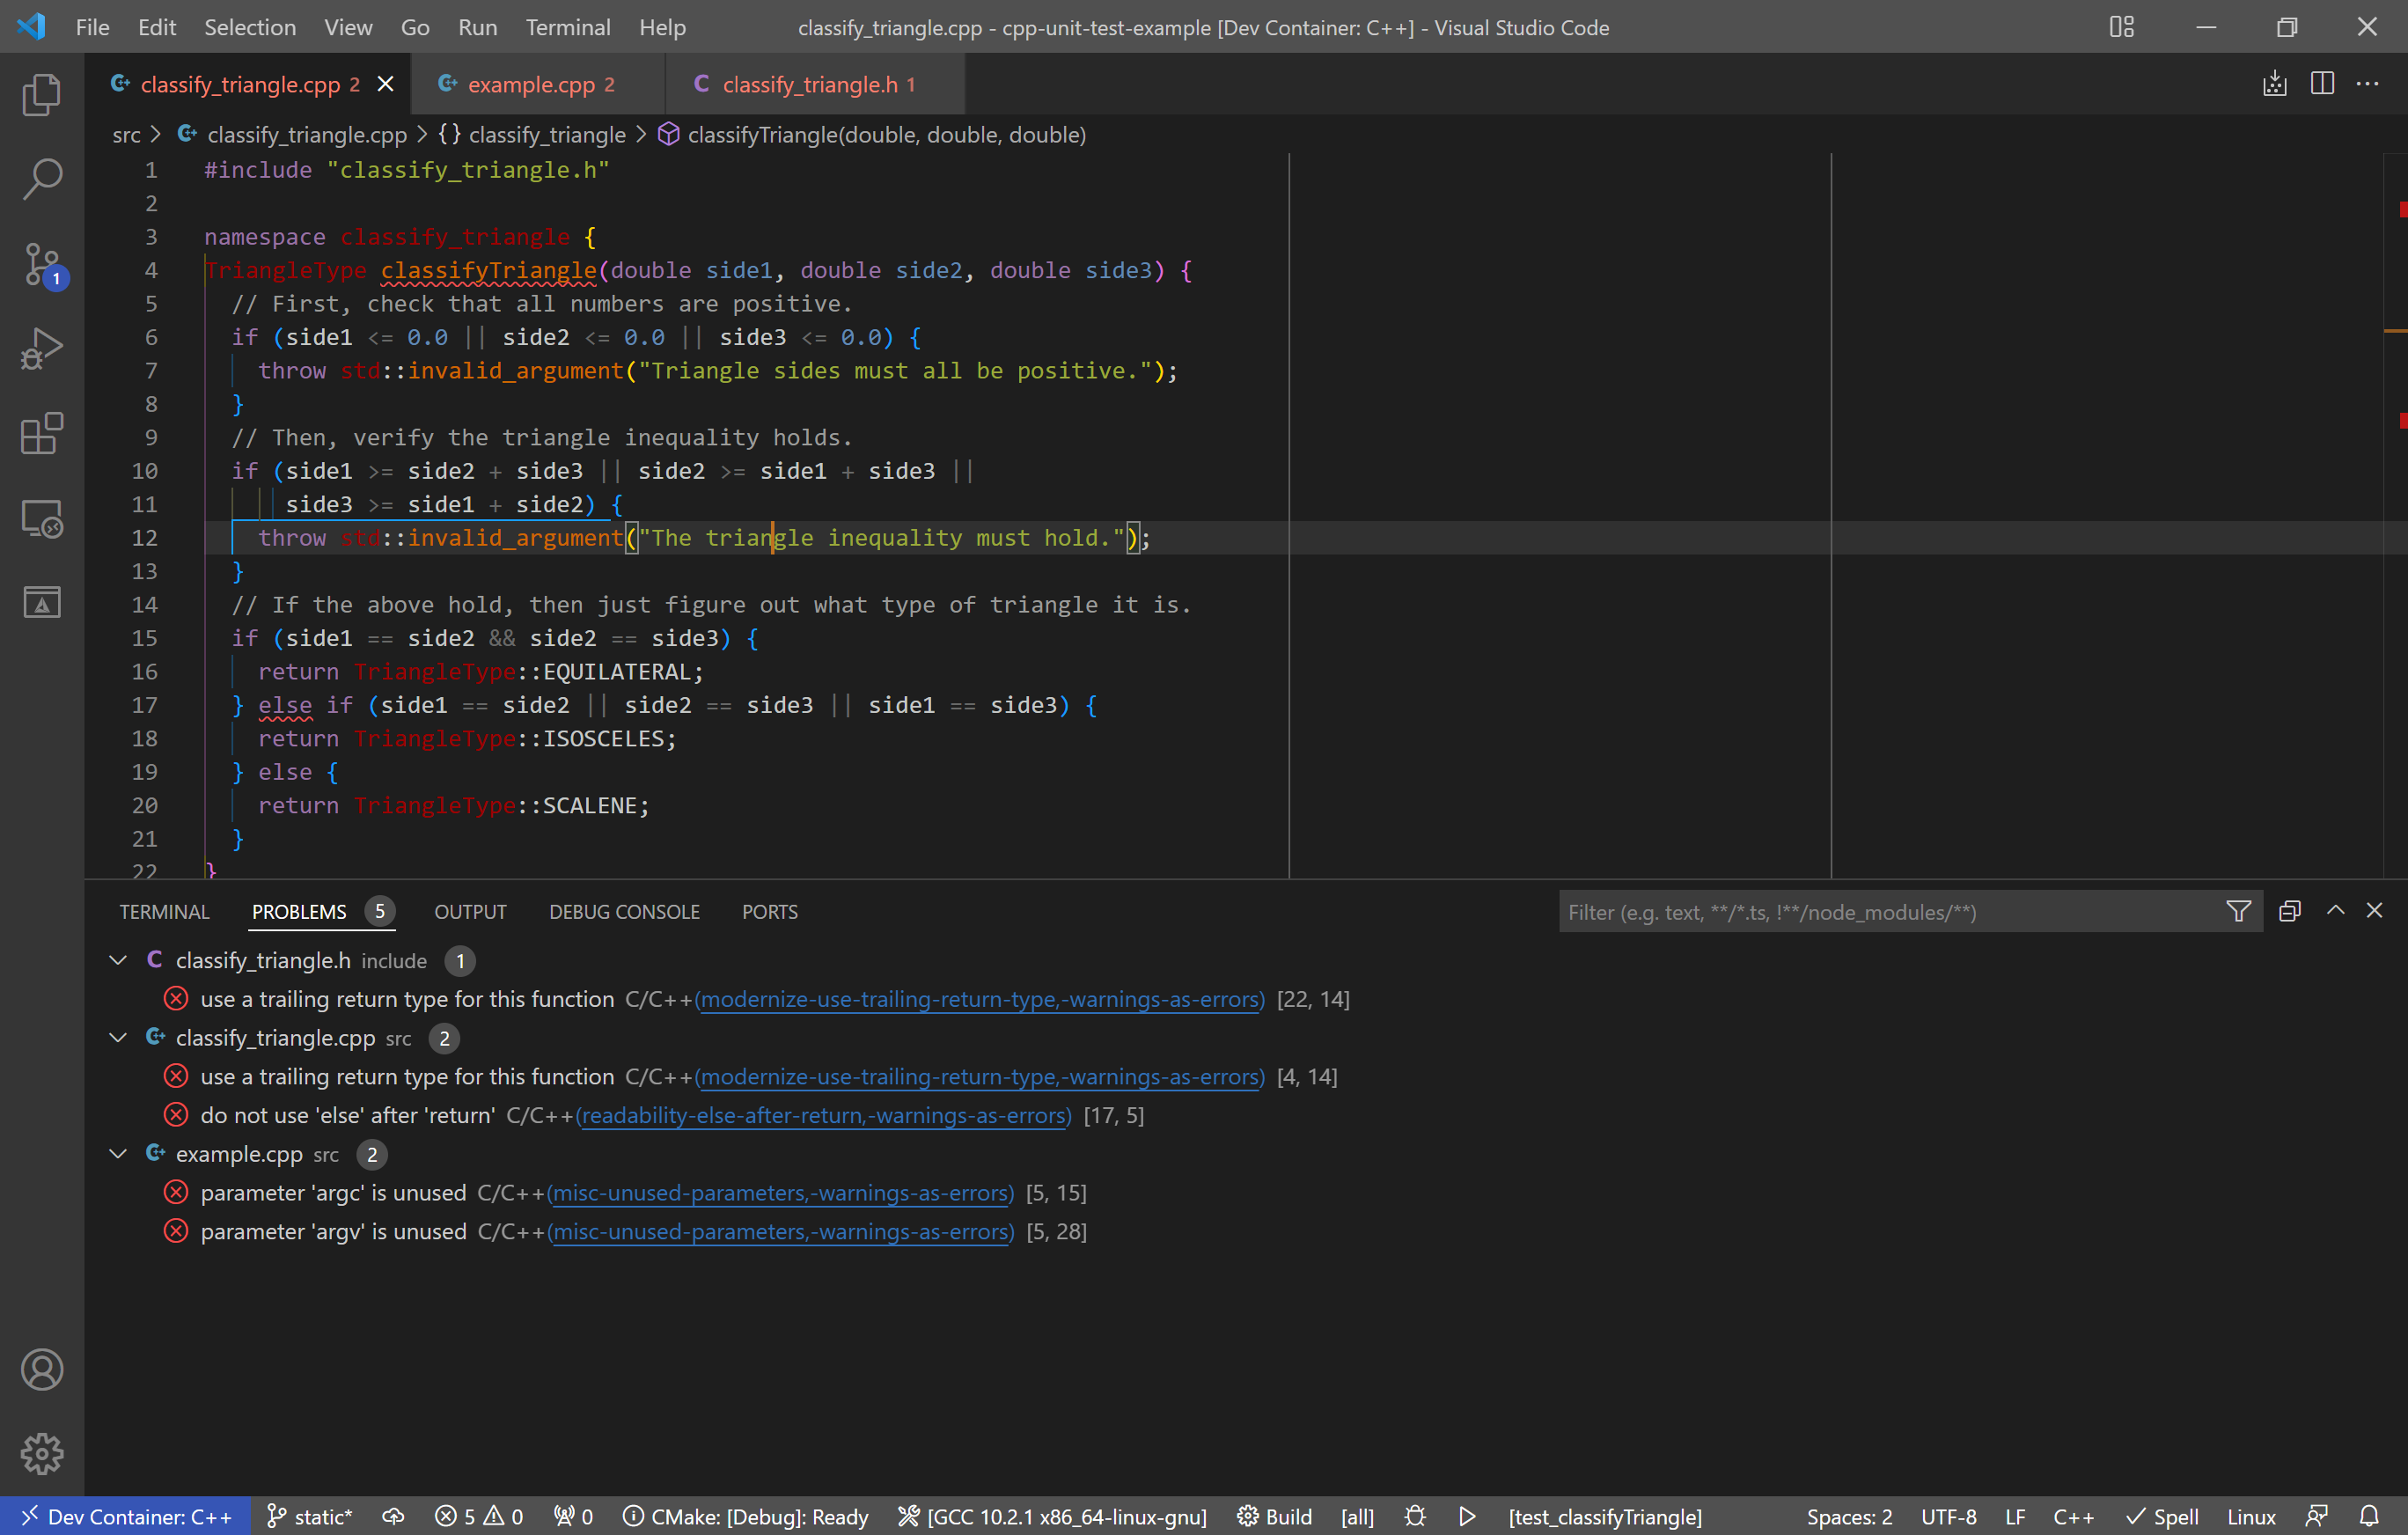
Once everything is configured, you will see a list of warnings and errors associated with each file. An example is below. The editor will also put squiggle marks on the relevant section of code. Likewise, you can click on the error or warning to jump to that part of the code.

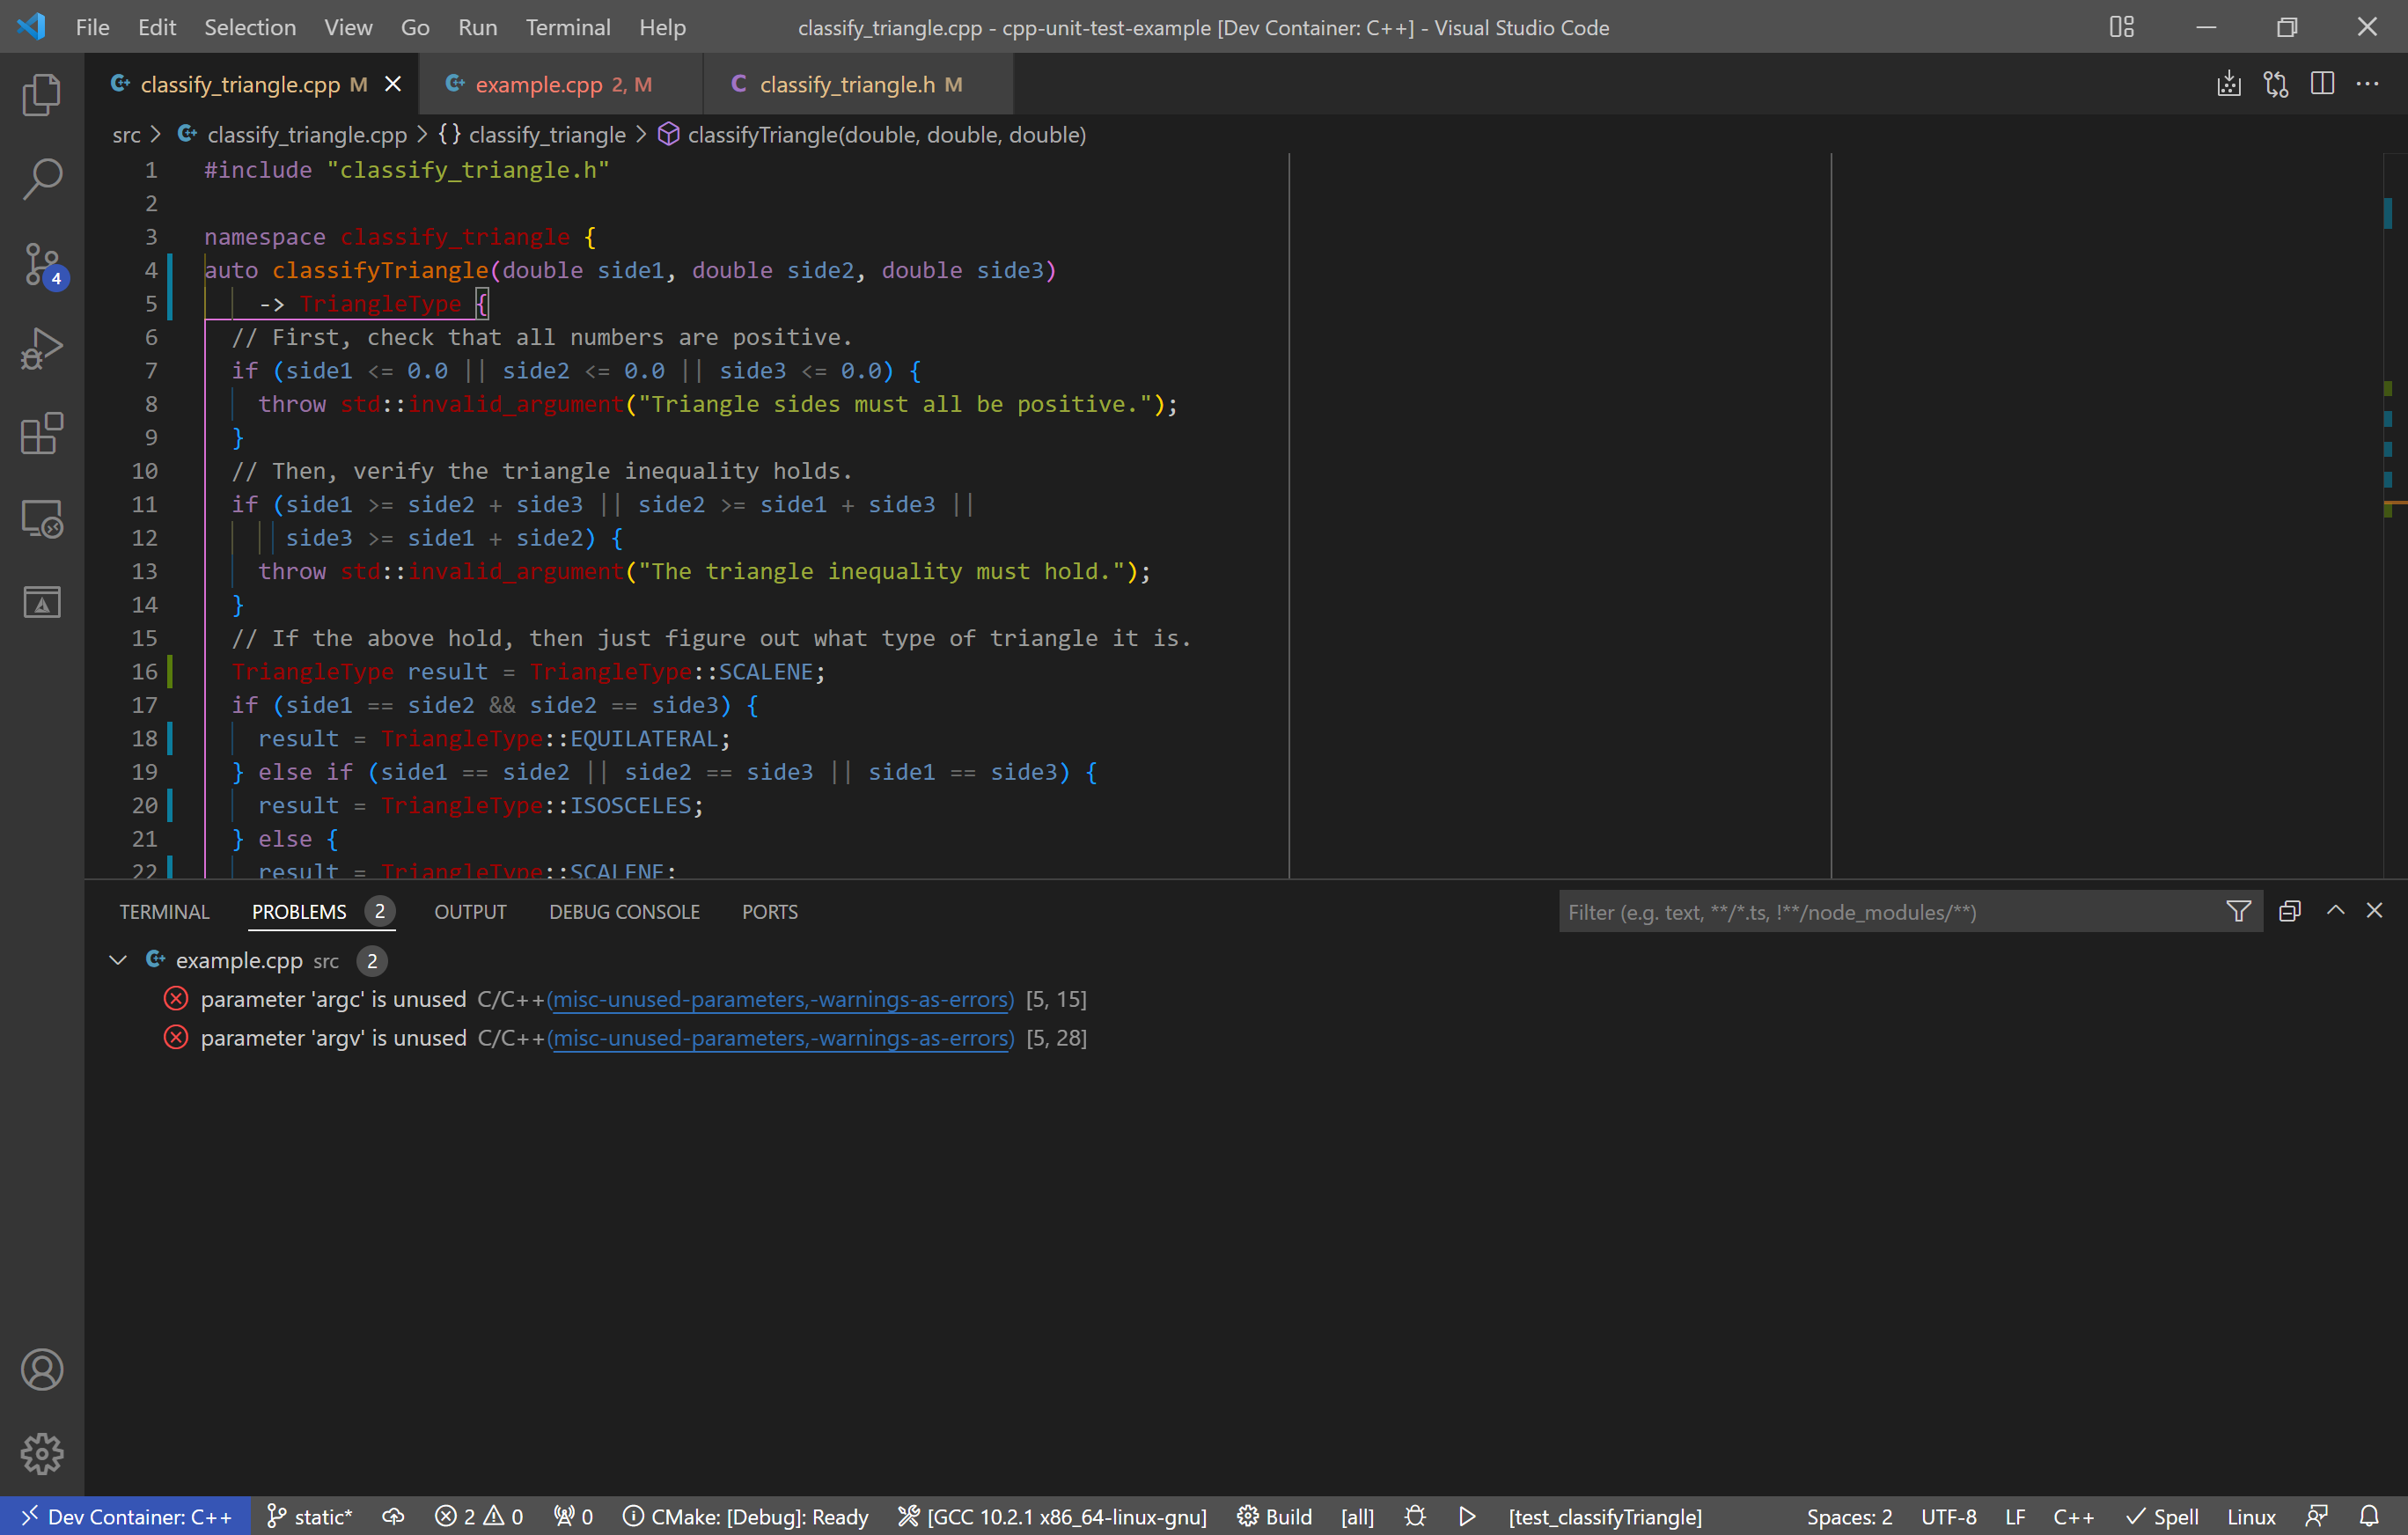
Using this, you can then make the recommended changes to your code. In my case, I modified the function declaration to use the more modern trailing return type syntax and rearranged the last if statement to avoid additional logic after a return. (Note: I had to disable a set of tests related to fuchsia as they did not like the trailing return style.) The only remaining issues are that I don’t use argv and argc. If I wanted to address that, I could disable the check on that line or use std::ignore.

While my example shows primarily readability issues, clang-tidy will also pick up safety issues, such as manual memory management and poor coding practices. You can also configure it to run as a CI check upon merge request. Regardless of how exactly you use it, clang-tidy is a useful tool to help improve your code as you develop.
The upgraded code with configuration file and recommended changes is found in this repository, under the static tag.
