
Setting up a GitHub Pages Space with Minimal Mistakes
This guide walks through the setup process for GitHub pages using Jekyll. Specifically, it uses the Minimal Mistakes theme. Minimal Mistakes is a theme that is already set up with a variety of templates. Because a lot of it is configured already, it is easy to use, powerful, and looks pretty sharp. I selected it because I liked the way collections can be displayed. The ability to put tables of contents and side panels on each page is an additional benefit. There are plenty of other themes out there though. For more, take a look here. For an overview of Jekyll, see their site.
This guide covers how to set up a simple set of pages. Specifically, this utilizes Docker and VS Code. These are not strictly necessary, but there are advantages for using them. Docker allows me to use Jekyll without going through the process of installing it. I don’t typically use Ruby, so I don’t have that all set up, and I tend to be a minimalist when it comes to new programming environments. VS Code is my default editor for most of my work, so is a natural inclusion. It also makes setting up the Docker container significantly easier.
This guide assumes you already have Docker and VS Code installed and are comfortable with them. Additionally, you will need the Remote - Containers extension installed within VS Code.
Create Project
Because of the way Jekyll and Minimal Mistakes are set up, there needs to be some sort of GitHub repository for them to use. This is okay, since that is where this content needs to go anyways to be visible as your page. To get it starting, just follow the first two steps located at GitHub’s tutorial. You can then open this workspace within VS Code. Anything merged into the main/master branch will be what appears at the URL they mention, which is based on your username.
Docker Container Setup
First, it is helpful to create a Docker container that can be used to run Jekyll. This will allow you to view your space by hosting it locally. Normally, you would have to construct a Dockerfile, however VS Code can create one easily. Assuming you already have Docker running, follow these steps.
- Within a new workspace, click on the green Open a Remote Window icon at the bottom left of the window.
- In the widow that appears, select Remote-Containers: Reopen in Container
- A list of containers will appear. Type in Jekyll. You might need to select Show all Definitions… for it to appear.
- Wait while the system builds and starts the container. You know it is finished when the bottom left green box now lists the container’s name.
After this completes, you will notice three new files in your workspace. The Docker file contains all the instructions for creating the container. Its contents are as follows:
FROM mcr.microsoft.com/vscode/devcontainers/ruby:2

# ENV Variables required by Jekyll
ENV LANG=en_US.UTF-8 \
    LANGUAGE=en_US:en \
    TZ=America/Chicago \
    LC_ALL=en_US.UTF-8 \
    LANG=en_US.UTF-8 \
    LANGUAGE=en_US

    # Install jekyll
RUN gem install bundler jekyll

# [Option] Install Node.js
ARG NODE_VERSION="lts/*"
RUN su vscode -c "source /usr/local/share/nvm/nvm.sh && nvm install ${NODE_VERSION} 2>&1"

# [Optional] Uncomment this section to install additional OS packages.
# RUN apt-get update && export DEBIAN_FRONTEND=noninteractive \
#     && apt-get -y install --no-install-recommends <your-package-list-here>

# [Optional] Uncomment this line to install additional gems.
# RUN gem install <your-gem-names-here>

# [Optional] Uncomment this line to install global node packages.
# RUN su vscode -c "source /usr/local/share/nvm/nvm.sh && npm install -g <your-package-here>" 2>&1
The devcontainer.json is used by VS Code to start the container and attach the workspace to it. Note that you can uncomment the line with the postCreateCommand. This will allow the system to update everything. You might need to recreate the container after though (or run that command manually).
{
	"name": "Jekyll (Community)",
	"build": {
		"dockerfile": "Dockerfile",
		"args": {
			"NODE_VERSION": "lts/*"
		}
	},

	// Set *default* container specific settings.json values on container create.
	"settings": {
		"terminal.integrated.shell.linux": "/bin/bash"
	},

	// Add the IDs of extensions you want installed when the container is created.
	"extensions": [],

	// Use 'forwardPorts' to make a list of ports inside the container available locally.
	"forwardPorts": [4000],

	// Use 'postCreateCommand' to run commands after the container is created.
	// "postCreateCommand": "bundle install",

	// Comment out connect as root instead. More info: https://aka.ms/vscode-remote/containers/non-root.
	"remoteUser": "vscode"
}
Lastly, it creates a tasks.json file. This is used by VS Code to define two tasks, Serve and Build. I don’t use Build but Serve is an easy way to bring up a local version of your pages for preview.
{
    // See https://go.microsoft.com/fwlink/?LinkId=733558
    // for the documentation about the tasks.json format
    "version": "2.0.0",
    "tasks": [
        {
            "label": "Serve",
            "type": "shell",
            "command": "bundle exec jekyll serve --livereload",
            "group": {
                "kind": "test",
                "isDefault": true
            },
            "isBackground": true,
        },
        {
            "label": "Build",
            "type": "shell",
            "command": "bundle exec jekyll build",
            "group": {
                "kind": "build",
                "isDefault": true
            },
        }
    ]
}
With that, the container is ready to go.
Empty Site
Next comes the creation of a bare bones site. This will be nothing more than a simple home page. To create it, follow the following steps. These are based on the instructions at Minimal Mistake’s site, found here
- Create a Gemfile at the project root directory with the following content. This specifies the needed Jekyll stuff.
source "https://rubygems.org" gem 'jekyll-include-cache' gem "github-pages", group: :jekyll_plugins - Create a _config.yml file at the project root directory with information specified below. This specifies some minimum information about your site that Jekyll needs, including the theme you are using. There are a ton of configuration settings that are very well documented here. These are just the ones needed to get it up and running.
title: kylerobots personal site
description: >- # this means to ignore newlines until "baseurl:"
  This is my simple website to showcase some of the neat projects that
  I work on and the various tutorials that I use.
# the subpath of your site, e.g. /blog
baseurl: ""
# the base hostname & protocol for your site, e.g. http://example.com
url: "https://kylerobots.github.io"

# Build settings
remote_theme: "mmistakes/minimal-mistakes"
plugins:
  - jekyll-feed
  - jekyll-include-cache
- Create a page for your homepage called index.md at the root level. You can just use the default layout provided by
Minimal Mistakes or customize your own.
--- layout: home author_profile: true --- - Open a new terminal within VS Code if there isn’t already one open.
- After creating those files, run
bundlewithin the terminal. This install a bunch of stuff the pages need.
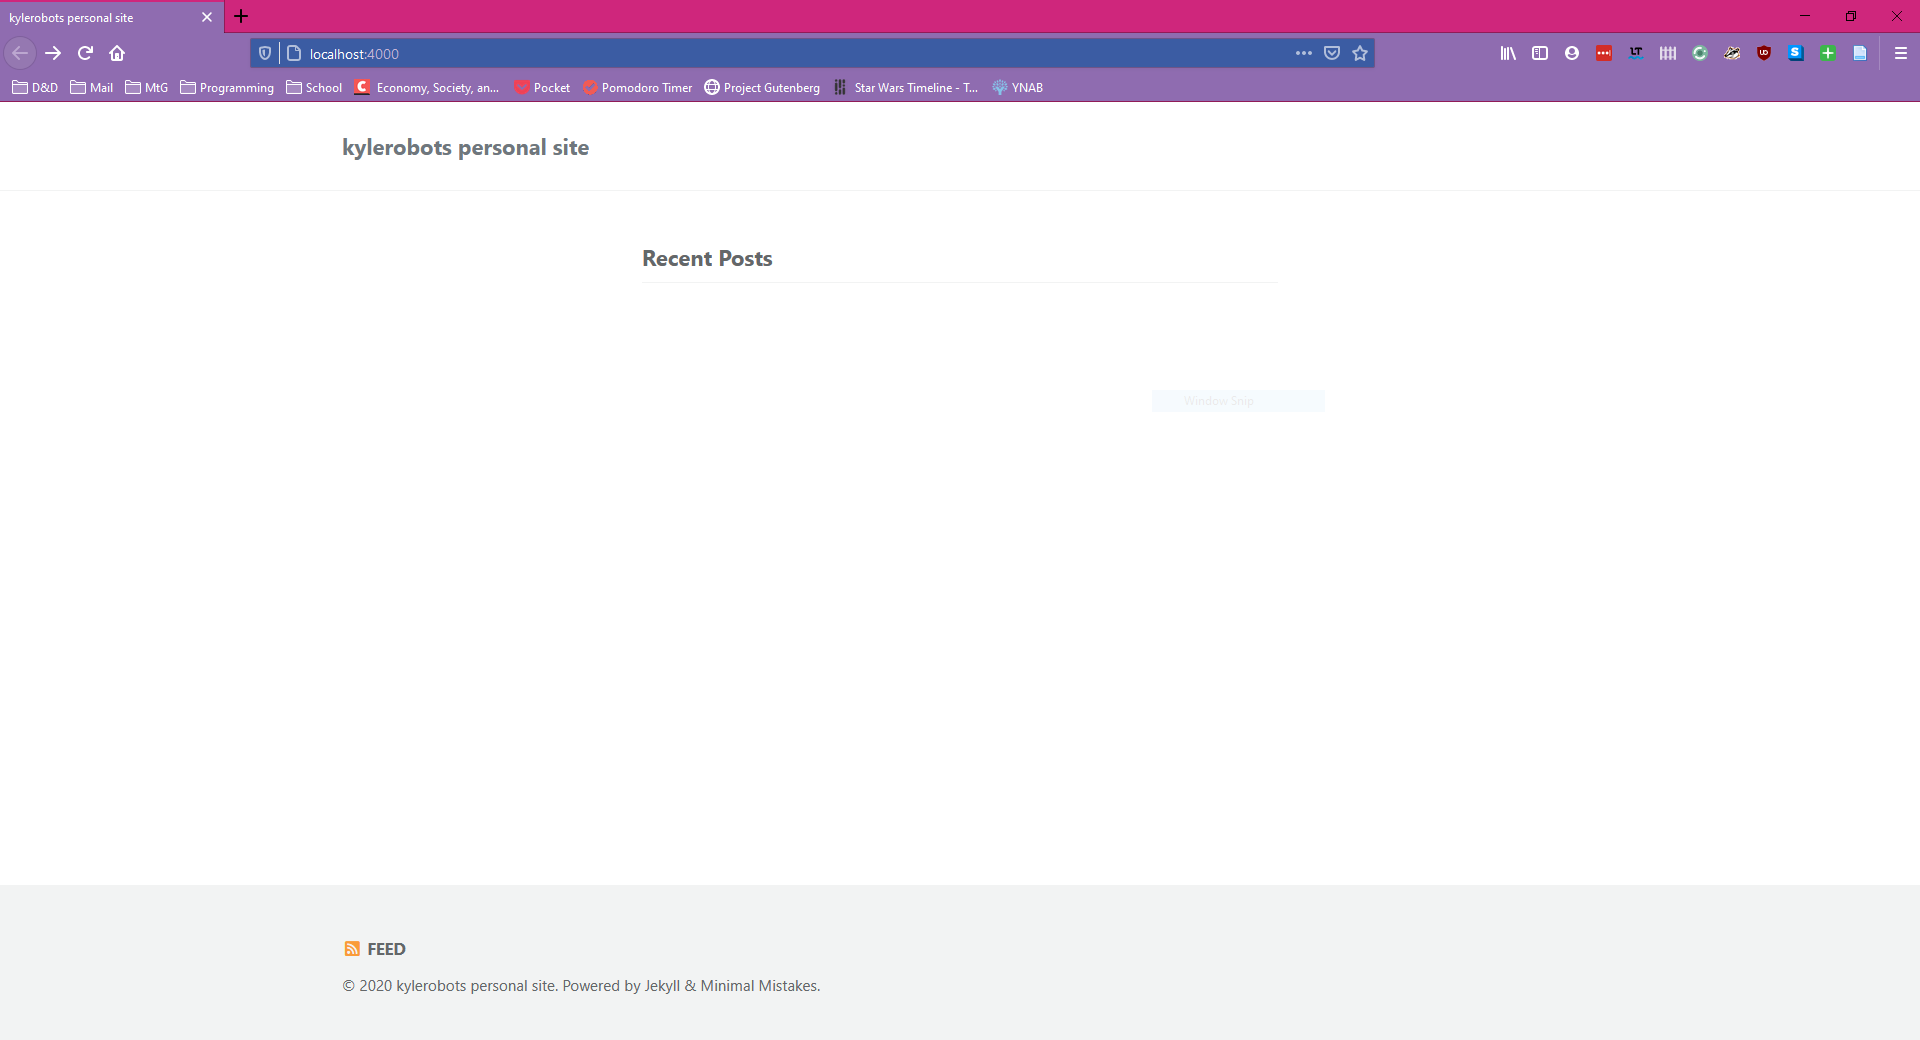
Testing the Setup
At this point, you are ready to try a local host! Save all the documents, then run the VS Code command Tasks: Run Task. You will
see a list of options. Select Serve. A bunch of stuff will appear on a terminal. Eventually, you will see a notice that the server
is running and a local address, most likely http://127.0.0.1:4000/ Ctrl-Click on this URL to open the page. You should see
something like the image below!
If not, double check that your configuration file is correct. If it does work, congrats! You have the basics needed to host your own GitHub pages!
Further Improvements
Obviously, the page is pretty basic. This section highlights a few things that can be done with the site. This is by no means exhaustive, so check the Quick Start Guide for all the information.
A quick note on updating though. If you modify the _config.yml file, you will need to relaunch the local host. It won’t update automatically. Any other page supposedly will trigger an update, but I’ve found it to be hit or miss.
Author Information
One of the neat aspects to this theme is the ability to have author information display on each page. Fortunately, you only have to customize it once.
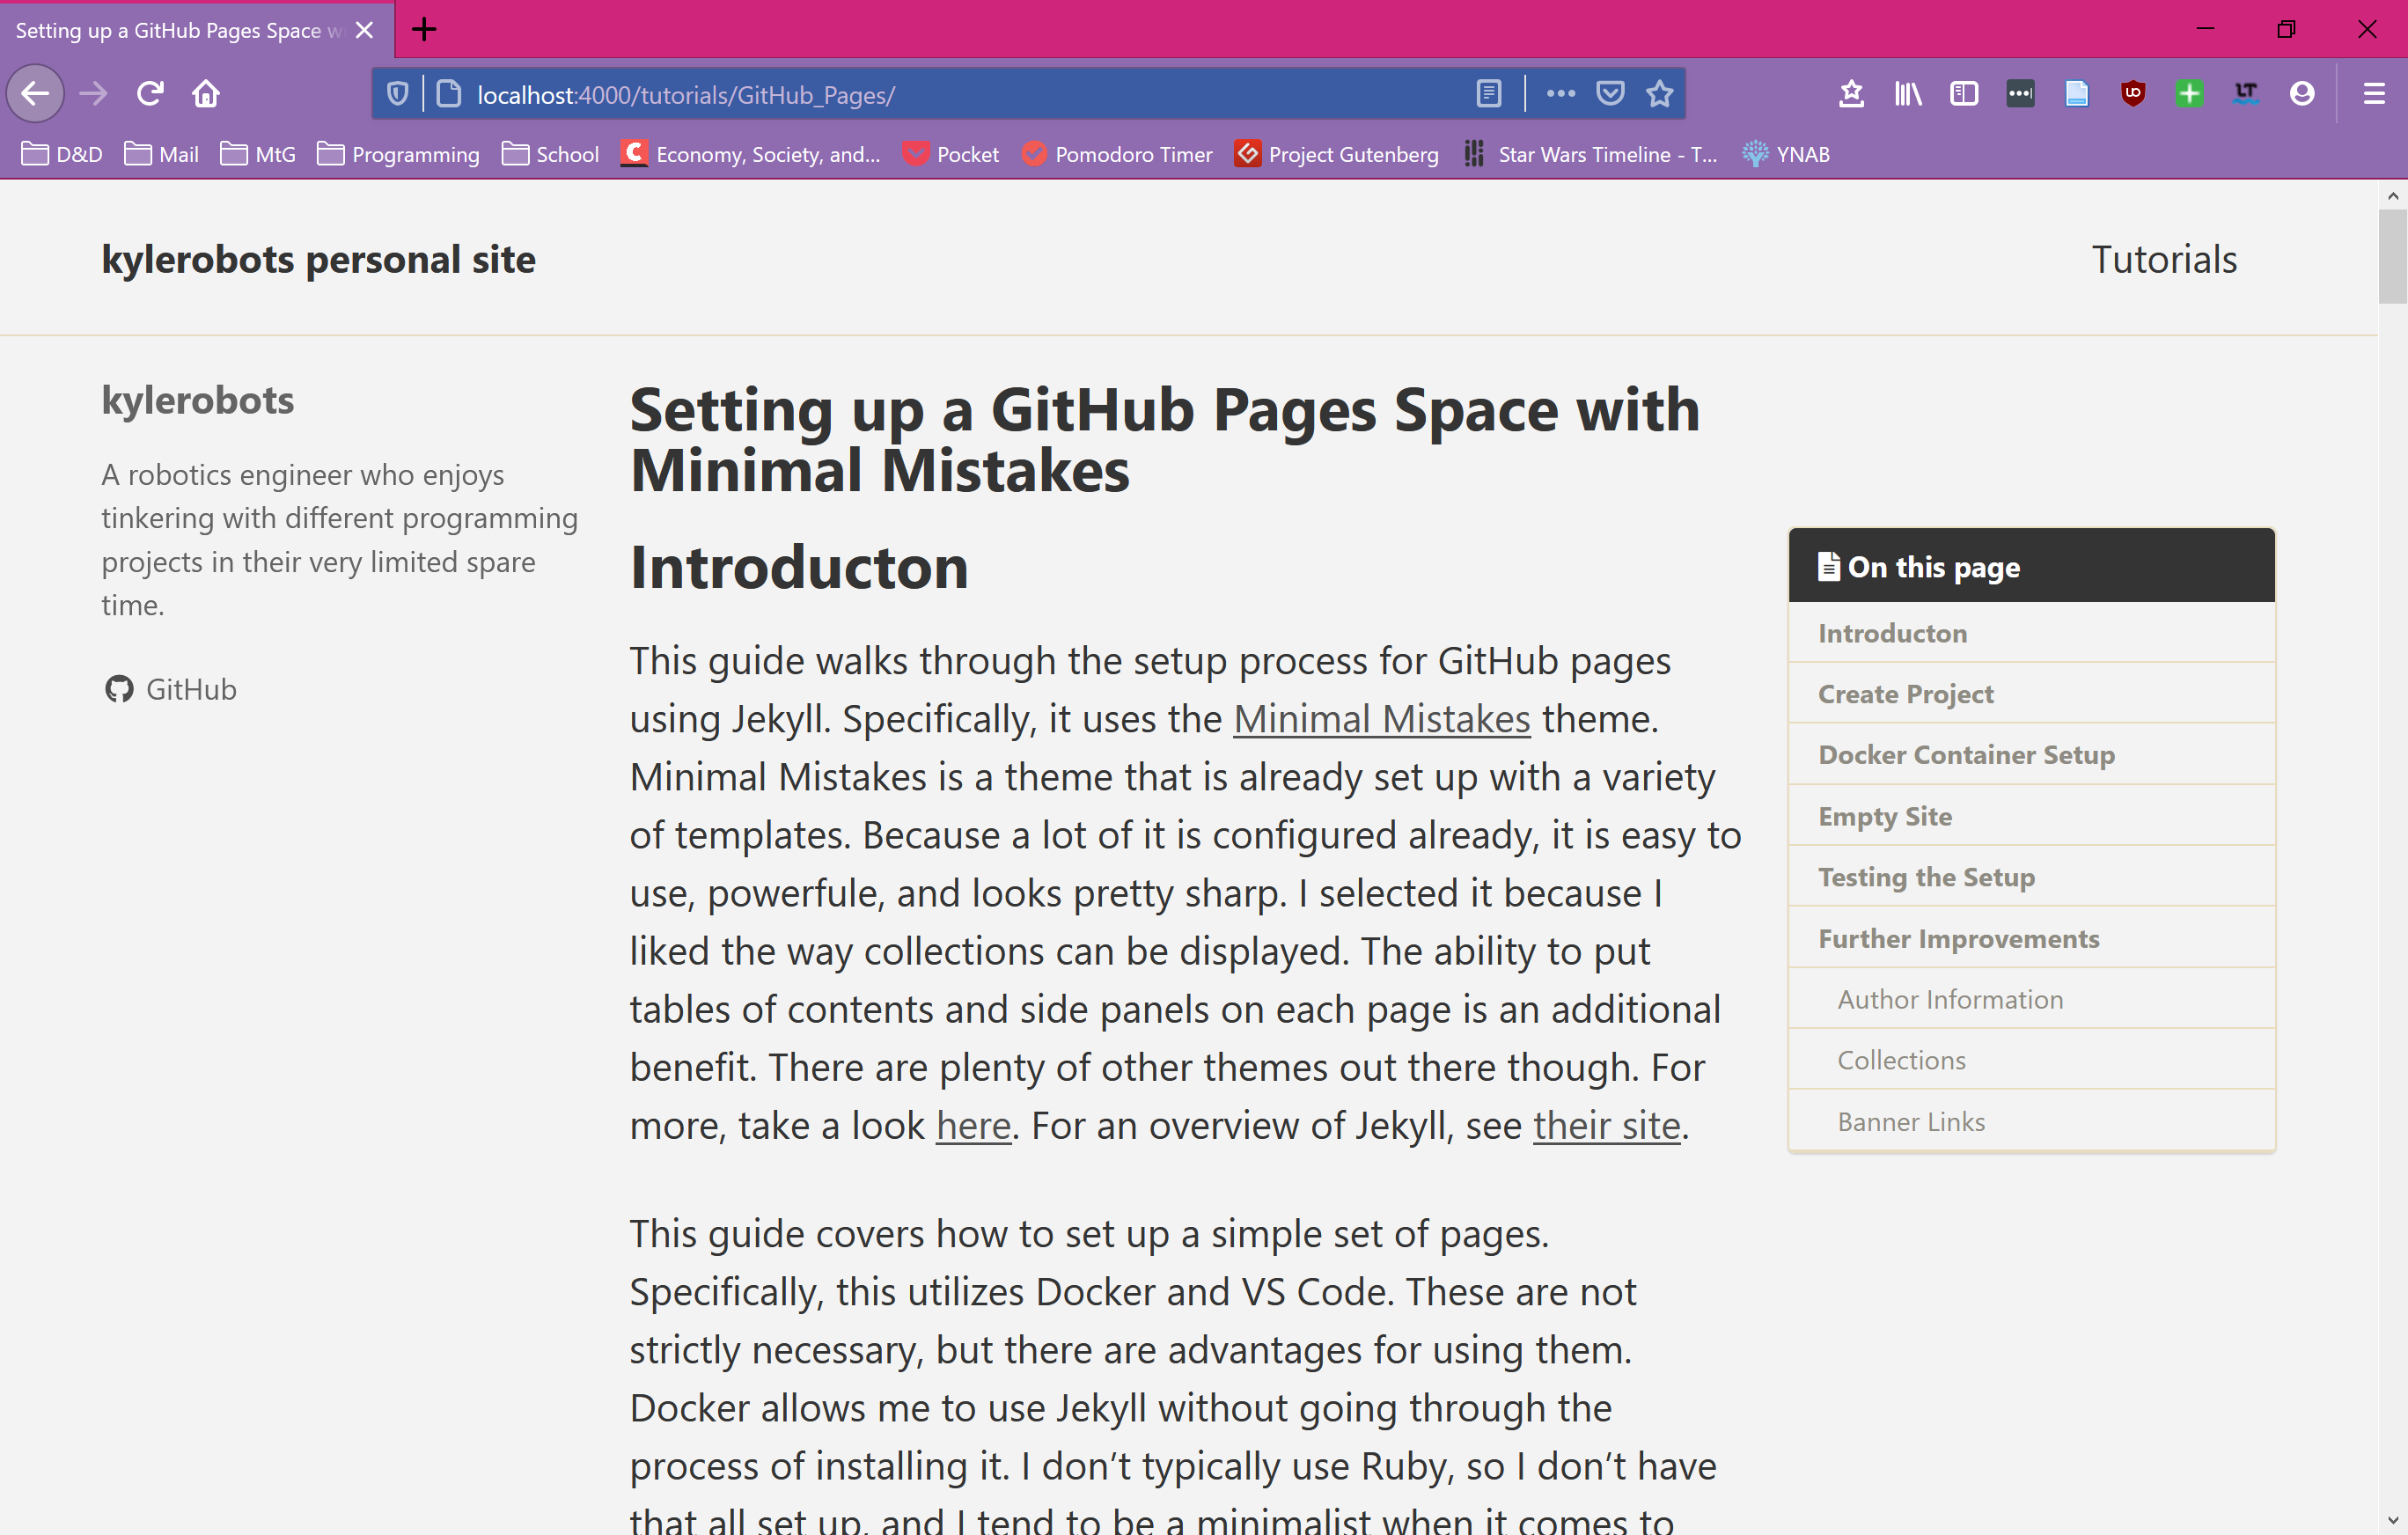
To add it, there are a number of fields that get added to the _config.yml file, like so.
author:
  name: "kylerobots"
  bio: "A robotics engineer who enjoys tinkering with different programming projects in their very limited spare time."
  links:
    - label: "GitHub"
      icon: "fab fa-fw fa-github"
      url: "https://github.com/kylerobots"
There is actually a lot more customization that can be added, just take a look at the documentation.
Collections
These are helpful for a grouping of related pages. I use this to group all of my tutorials together.

The instructions on collections located here and
here are pretty good. The only thing I note is that the
collections_dir setting doesn’t seem to allow subdirectories. In other words, each collection’s folder exists at the
top level. I might just be doing something wrong though.
Banner Links
I also like the ability to add a banner of common links at the top of the page.
This makes it easy to navigate around the site. To customize what goes there, create a folder called _data if one doesn’t exist already. The, create a file within it called navigation.yml. Place as many links as you want to appear in the file like so.
main:
  - title: "Tutorials"
    url: tutorials
Extras will collapse down in the banner. For more information, see the usage guide on this file, located here